Maintaining your home’s heating and water systems might seem daunting, but it’s crucial for comfort, safety, and saving money. We often take these essential utilities for granted, yet neglect can lead to unexpected breakdowns, soaring energy bills, and even health risks.
This comprehensive guide will equip you with the knowledge to care for your home’s most vital systems. We will explore the nuances of keeping boilers, furnaces, water heaters, and plumbing in top condition. Whether you’re dealing with residential heating needs or managing more complex equipment common in residential and light-commercial HVAC applications, understanding maintenance is key to longevity and efficiency.
Join us as we delve into actionable strategies, from routine cleaning and flushing to identifying early warning signs of trouble. We’ll also cover crucial safety protocols for fuel-burning appliances and essential seasonal preparations to protect your home year-round.
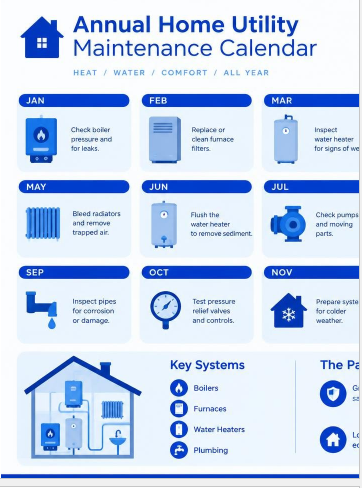
A well-maintained heating and water system isn’t just about comfort; it’s about energy efficiency, safety, and extending the lifespan of expensive equipment. Our approach is guided by best practices, including those outlined in standards like BS 7593:2019, which provides a comprehensive code of practice for domestic heating and cooling water systems. This standard emphasizes a proactive strategy encompassing preparation, commissioning, and continuous maintenance.
The primary adversaries of any domestic heating water system are corrosion, sludge, scale, and microbiological contamination. Corrosion, often manifesting as magnetite sludge (essentially rust), is identified as the most common cause of failure in heating components. This sludge can circulate through the system, reducing heat transfer efficiency, blocking pipes, and causing premature wear on pumps and heat exchangers. Scale, or limescale, is particularly prevalent in hard water areas (defined as >200 mg/L CaCO₃). It forms a insulating layer on heat exchange surfaces, leading to reduced efficiency, increased energy consumption, and the characteristic “kettling” noise in boilers. Microbiological contamination can also occur, particularly in cooling systems, leading to blockages and potential health hazards.
To combat these issues, various cleaning methodologies are employed:
- Powerflushing: This method utilizes an external pump to circulate water and specialized chemicals at high velocity through the heating system. It’s highly effective at dislodging and removing significant accumulations of magnetite sludge and other debris. Powerflushing is often recommended after a boiler replacement or when a system is experiencing widespread cold spots on radiators due to blockages.
- Mains Pressure Cleaning: As the name suggests, this technique relies on the pressure of the mains water supply to flush out the system. While less aggressive than powerflushing, it can be effective for systems with less severe contamination or as a pre-flush to remove loose debris before chemical treatment.
- Gravity Cleaning: This is the simplest method, involving repeated draining and refilling the system with fresh water. It’s suitable for smaller, older, or more delicate systems that might not withstand the higher pressures of other methods. While less thorough, it can still help remove some loose sediment.
Choosing the right method depends on the system’s age, condition, and the nature of the contamination. Before any significant cleaning, we always identify the system type (open vented vs. sealed) and assess water hardness to select the most appropriate treatment.
Cleaning Method Primary Application System Suitability Efficacy for Sludge/Scale Complexity Powerflushing Heavy sludge, widespread blockages Robust systems, post-boiler replacement High Professional Mains Pressure Moderate sludge, pre-treatment Most domestic systems, less severe issues Medium DIY/Professional Gravity Cleaning Light debris, older/fragile systems Small, older, or open-vented systems Low DIY
Chemical Treatments and Filtration when Maintaining Home Heating and Water Systems
Once a heating system is thoroughly cleaned, the next crucial step is to protect it from future degradation. This involves the strategic application of chemical treatments and the installation of filtration devices.
Corrosion inhibitors are essential for preventing the internal rusting that leads to magnetite sludge. These chemicals form a protective layer on the internal surfaces of pipes and components, significantly extending their lifespan. It’s vital that these inhibitors are applied only after the system is free of sludge and scale, as their effectiveness can be compromised by existing contamination. For cooling systems, or where microbiological contamination is a concern, biocide dosing may also be necessary to prevent the growth of bacteria and algae.
The effectiveness of these additives is not permanent. According to industry standards, corrosion and scale inhibitor should be re-dosed at five-year intervals since the last treatment. Furthermore, the concentration of additives in system water should be checked after commissioning and annually thereafter throughout the life of the system. This annual check ensures that the protective chemicals remain at optimal levels, providing continuous protection.
In-line magnetic filters are another critical component in modern heating systems. These filters are designed to capture any remaining magnetic sludge particles (magnetite) that might still be circulating, even after a thorough clean. Installed after major cleaning, they act as a safeguard, protecting sensitive components like the boiler’s heat exchanger and circulating pump from abrasive damage. Regular cleaning of these filters is essential to maintain their effectiveness.
For solar thermal hot water systems, which use a glycol-based fluid to transfer heat, maintaining the antifreeze properties is crucial, especially in colder climates. It will be necessary to top up or re-fill the system anti-freeze every 3-4 years to ensure optimal performance and prevent freezing damage.
Heating vs. Cooling: Contrasting System Requirements
While both heating and cooling systems aim to regulate indoor temperatures, their operational principles and maintenance needs differ significantly. Understanding these distinctions is key to effective home utility management.
Domestic central heating systems, particularly hydronic (water-based) systems, rely on the circulation of heated water through a closed loop of pipes and radiators or underfloor heating. The primary maintenance focus here is on water quality, as discussed, to prevent corrosion, sludge, and scale. This involves regular cleaning, inhibitor dosing, and filtration to ensure efficient heat transfer and component longevity. Boiler efficiency, pressure maintenance, and air bleeding from radiators are also critical.
Cooling systems, such as central air conditioning or heat pumps operating in cooling mode, primarily use refrigerants to absorb heat from indoor air and release it outside. Their maintenance involves different considerations:
- Refrigerant Charging: Ensuring correct refrigerant levels is vital for efficient operation. Low levels can indicate leaks and reduce cooling capacity.
- Condensate Drains: Air conditioning systems produce condensate (water) as they dehumidify the air. These drains must be kept clear to prevent blockages, water damage, and mold growth.
- Coil Cleaning: Evaporator and condenser coils can accumulate dirt and debris, reducing their ability to transfer heat. Regular cleaning is essential.
- Airflow: Maintaining clean air filters and unobstructed vents is crucial for both heating and cooling efficiency.
Air-source heat pumps, which provide both heating and cooling, require a unique blend of maintenance. While their indoor components share similarities with traditional HVAC, the outdoor unit needs specific attention. A yearly visual inspection to clear leaves, debris, and nearby vegetation from the inlet grill and evaporator is recommended to ensure optimal airflow and prevent damage. Our experience with residential and light-commercial HVAC systems highlights that proactive maintenance, tailored to the specific system type, is the most cost-effective approach for homeowners.
Combustion Appliance Care and Flue Safety Protocols
For homes utilizing fuel-burning heating appliances—such as natural gas furnaces, oil boilers, or wood stoves—safety protocols are paramount. These systems produce combustion byproducts, including carbon monoxide (CO), a colorless, odorless, and highly toxic gas. Proper maintenance and understanding of flue safety are not merely about efficiency; they are about protecting lives.
A critical safety concern is combustion backdrafting and spillage. This occurs when household exhaust appliances, such as powerful range hoods, bathroom fans, clothes dryers, or even open fireplaces, create a negative pressure (depressurization) inside the home. This negative pressure can be strong enough to overcome the natural upward draft in chimneys and flues, causing outdoor air to pull downward and, more dangerously, pulling combustion gases from fuel-burning appliances back into the living space.
The warning signs of a backdrafting problem are subtle but critical:
- Combustion odors upon appliance startup.
- Soot or discoloration at draft hoods or around appliance vents.
- Melted plastic grommets on water heaters, indicating excessive heat spillage.
- Vent pipe condensation or rust, suggesting improper venting.
- Yellow burner flames instead of clear blue flames (though some appliances, like fireplaces, naturally have yellow flames).
- Frequent activation of carbon monoxide detectors.
Operating a furnace with its fan access panel off, for instance, can directly cause combustion gases from the furnace or a nearby water heater to spill into living areas. We stress the importance of ensuring all combustion air supply is clear and unobstructed. Installing insulated fresh-air and combustion-air intake ducts can help mitigate depressurization issues caused by high-powered exhaust fans, ensuring a safe supply of oxygen for combustion and proper venting of byproducts.
Fuel-Burning Appliance Inspections and Sweeping Schedules
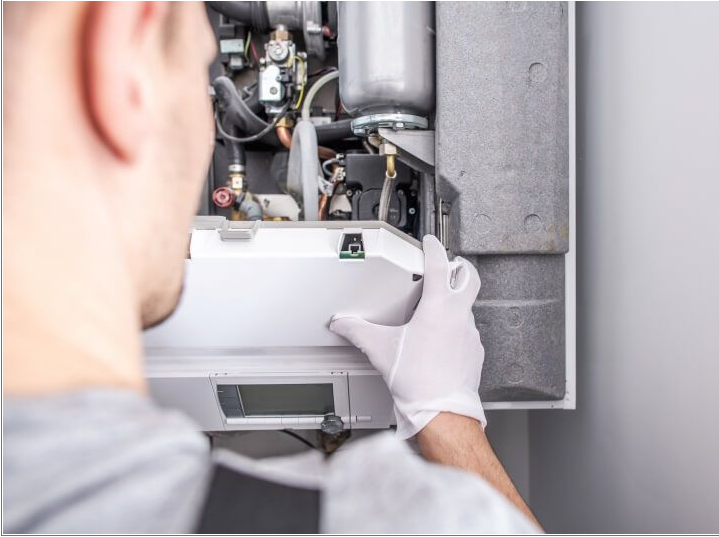
Regular professional inspections and maintenance are non-negotiable for fuel-burning appliances. We recommend scheduling an annual service for all heating appliances. This frequency aligns with manufacturer instructions and ensures optimal safety and efficiency. For gas-fired appliances, it is imperative that the engineer is registered with the Gas Safe Register (or equivalent local regulatory body), demonstrating their competence and qualification. Similarly, oil-fired units should only be serviced by certified technicians.
During these inspections, technicians will check for proper combustion, gas leaks, flue integrity, and the overall condition of the appliance. They will also ensure that safety devices are functioning correctly. Homeowners should never store flammable liquids or paints near fuel-burning appliances, as this poses a severe fire hazard.
Chimney sweeping frequencies vary significantly based on the type of fuel burned, as recommended by organizations like the Guild of Master Chimney Sweeps:
- Smokeless coals: At least once a year.
- Wood: Up to four times a year, due to creosote buildup.
- Bituminous coal: Twice a year.
- Oil burning: Once a year.
These schedules are crucial for preventing dangerous soot and creosote buildup, which can lead to chimney fires or blockages that cause carbon monoxide to back up into the home.
Beyond professional servicing, homeowners have a vital role in ongoing safety. We advise checking and replacing batteries in smoke and carbon monoxide alarms yearly. This can be conveniently coordinated with your annual heating system service. These alarms are your first line of defense against the silent killer, carbon monoxide, and early fire detection.
Domestic Water Heaters and Plumbing Infrastructure
The water heater is a cornerstone of daily home comfort, providing hot water for washing, cleaning, and bathing. Most tank water heaters have a lifespan of 8 to 12 years. However, this longevity is heavily influenced by maintenance and water quality. One of the most common issues affecting tank water heaters is sediment buildup at the bottom of the tank. This sediment, often mineral deposits from hard water, reduces the heater’s efficiency by creating an insulating layer between the burner and the water. It can also cause “kettling” noises – a popping or rumbling sound as water gets trapped and boils beneath the sediment. To combat this, we recommend flushing the water heater annually, or even twice a year (typically before the heating season), to remove accumulated sediment and extend its life.
Pressure relief valves are critical safety components on water heaters. They automatically release pressure if it becomes too high, preventing potential tank rupture. While homeowners typically don’t service these, it’s good to be aware of their presence and function.
Early Detection of Hardware Degradation in Maintaining Home Heating and Water Systems
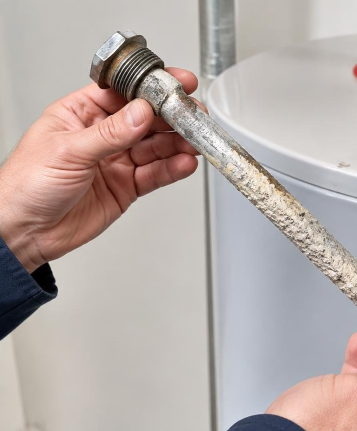
Proactive inspection can significantly extend the life of your plumbing infrastructure and prevent costly emergencies. A key component for water heater longevity is the sacrificial anode rod. This magnesium, aluminum, or zinc rod is designed to corrode instead of the steel tank, protecting the tank from rust. Anode rod depletion is a primary early warning sign of water heater failure. We advise inspecting the anode rod every 2-3 years, but in hard water states like Arizona, Texas, Nevada, and parts of California, annual inspection is a reasonable schedule due to accelerated wear. Replacing a depleted anode rod can add years to your water heater’s life.
Water quality, particularly water hardness, significantly impacts plumbing components. Hard water accelerates scale accumulation, not just in water heaters, but also in pipes, faucets, and showerheads, reducing flow and efficiency. For homeowners relying on well water, understanding your specific water chemistry is even more critical. Resources are available from organizations dedicated to private-well owners support to help you test and treat your water effectively. This proactive approach can prevent premature degradation of your entire water system.
Another commonly missed plumbing problem is a seized main shut-off valve. This valve controls the water supply to your entire home. If it seizes due to lack of use, you won’t be able to turn off your water in an emergency, leading to potentially catastrophic water damage. We recommend testing your main shut-off valve annually by turning it off, verifying no water at a tap, and then turning it back on smoothly. If it’s stiff or won’t turn, call a professional.
Sewer Lines and Critical Drainage Management
While often out of sight, your sewer lines and drainage system are vital for household sanitation. Problems here can quickly escalate from minor annoyances to major health hazards and expensive repairs. Early detection of issues is key.
Common signs of a developing sewer line problem include:
- Drain gurgling: Gurgling sounds coming from toilets or drains, especially after flushing another fixture, often indicate trapped air due to a blockage.
- Simultaneous backups: If multiple drains (e.g., a toilet and a shower) back up at the same time, it strongly suggests a main sewer line blockage rather than a localized clog.
- Sewage odors: Persistent foul odors emanating from drains can indicate a crack in the sewer line or a blockage.
- Slow drains: While a single slow drain might be a local clog, multiple slow drains could point to a larger issue.
When these signs appear, it’s time to call a professional. Intermittent sewer-line restrictions, active leaks, or persistent issues beyond a simple plunger fix require expert diagnosis and repair. Root intrusion from nearby trees is a common cause of sewer line blockages and damage, often requiring professional snaking or repair.
For homes with basements or crawl spaces, a sump pump provides crucial protection against flooding, especially during heavy rains. Proper inspection and maintenance are vital to ensure it functions when needed most. We recommend inspecting your sump pump regularly:
- Check for debris: Ensure the pit is free of dirt, gravel, or other obstructions that could interfere with the pump’s operation or float switch.
- Test the float switch: Pour water into the sump pit until the float rises and activates the pump. The pump should turn on, discharge the water, and then turn off as the water level drops.
- Inspect the discharge line: Ensure the discharge pipe is clear and directs water well away from your home’s foundation to prevent it from recirculating back into the pit.
- Check the check valve: This valve prevents discharged water from flowing back into the pit.
Regular checks ensure your sump pump is ready to protect your home from water damage during critical weather events.
Seasonal Protection and Exterior Plumbing Winterization
As seasons change, so too do the maintenance priorities for your home’s exterior plumbing and structural elements. Preparing your home for colder months, in particular, is crucial to prevent costly damage from freezing temperatures.
The essential steps for winterizing outdoor plumbing components are designed to prevent pipes from freezing and bursting, which can lead to significant water damage.
- Disconnect Hoses: Remove all garden hoses from outdoor spigots (hose bibbs). Leaving them attached can trap water in the faucet body, leading to freezing and cracking.
- Drain Spigots: If your outdoor spigots have separate interior shut-off valves, turn these off. Then, open the exterior spigots to allow any residual water in the line to drain out. Even if you don’t have interior shut-off valves, disconnecting hoses is critical.
- Insulate Exposed Pipes: For any exposed plumbing pipes in unheated areas like garages, crawl spaces, or basements, apply foam pipe insulation. This provides an extra layer of protection against freezing.
Beyond plumbing, other exterior elements require seasonal attention:
- Flat Roof Coating: If you have a flat roof, it’s recommended to have it coated every 3-5 years. This protective layer helps seal minor cracks, reflects sunlight to reduce heat absorption in summer, and adds a barrier against moisture intrusion, especially important before winter.
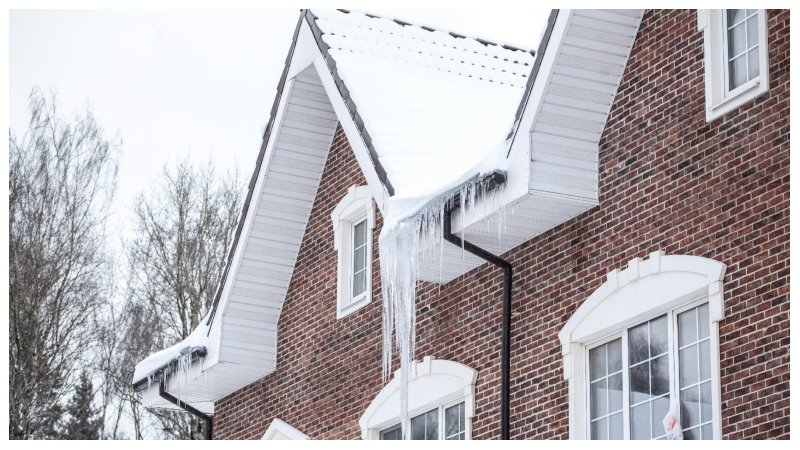
- Gutter Clearance: After autumn, gutters and downspouts can become clogged with leaves and debris. We advise cleaning them thoroughly to ensure proper water flow. Clogged gutters can lead to ice dams in winter, causing water to back up under shingles and into your home. They can also overflow, directing water towards your foundation, potentially leading to basement flooding or foundation damage.
- Brick Mortar Inspection: Annually inspect exterior brick mortar for loose, crumbling, or missing joints. Repointing (filling in new mortar) is essential to prevent water intrusion into the wall cavity, which can freeze and expand, causing further damage.
These preventative measures, often simple DIY tasks, can save homeowners from expensive repairs and headaches down the line.
Frequently Asked Questions About Home Utilities
We understand that homeowners often have specific questions about the practicalities of maintaining their heating and water systems. Here, we address some of the most common inquiries.
How often should a central heating system be cleaned and flushed?
The frequency for cleaning and flushing a central heating system can vary, but generally, a thorough clean and flush, such as powerflushing, might be needed every 5 to 10 years, or when specific issues arise. According to BS 7593 guidelines, the system water quality should be checked annually, and corrosion inhibitors should be re-dosed every five years.
You should consider a cleaning and flushing operation if you notice:
- Cold spots on radiators: This is a classic sign of sludge (magnetite) buildup restricting water flow.
- Excessive boiler noise: Often caused by scale buildup or sludge affecting the heat exchanger.
- Slow heating times: Reduced efficiency due to internal blockages.
- Frequent boiler breakdowns: Can be a symptom of underlying system contamination.
- After a new boiler installation: It’s crucial to clean the existing pipework to protect the new appliance from old system debris.
Regular water quality testing and annual professional servicing will help determine the optimal schedule for your specific system.
What are the earliest warning signs of water heater failure?
Catching water heater issues early can prevent a complete breakdown and potential water damage. Look out for these indicators:
- Sediment popping sounds: A rumbling, popping, or knocking noise coming from the tank is often caused by sediment buildup at the bottom, which overheats and creates steam bubbles.
- Reduced hot water supply: If your hot water runs out faster than usual, it could indicate sediment buildup reducing tank capacity or a failing heating element.
- Lukewarm water: This suggests a problem with the heating elements (electric) or burner (gas), or a thermostat malfunction.
- Rusty or discolored water: If the hot water from your tap appears rusty, it can be a sign of internal tank corrosion, especially if the cold water is clear. This also indicates the sacrificial anode rod may be depleted.
- Leaks around the base: Any visible water pooling around the bottom of the heater is a clear sign of a leak, which could be from a faulty valve, a loose connection, or a corroded tank.
- Age benchmarks: Most tank water heaters last 8 to 12 years. If yours is approaching or past this age, it’s wise to be more vigilant and consider proactive replacement.
What causes combustion backdrafting and how is it detected?
Combustion backdrafting occurs when the air pressure inside your home becomes lower than the air pressure outside, effectively reversing the natural flow of exhaust gases up a chimney or flue. This “negative pressure” is typically created by powerful exhaust fans in your home, such as:
- Kitchen range hoods
- Bathroom exhaust fans
- Clothes dryers (especially older models or those with long duct runs)
- Fireplaces or wood stoves (if drawing air from the house rather than a dedicated outdoor air supply).
When these appliances are running simultaneously, they can pull air from the house faster than it can be replaced, leading to depressurization. This creates a vacuum effect that can pull combustion byproducts, including dangerous carbon monoxide, back into your living space from fuel-burning appliances like furnaces, boilers, or water heaters.
Detection involves both physical signs and safety equipment:
- Physical Indicators: Look for soot or discoloration around appliance draft hoods, melted plastic grommets on water heater vents, excessive condensation or rust on vent pipes, and yellow or orange flames (instead of blue) on natural gas appliances (excluding decorative gas logs). You might also notice a distinct combustion odor upon appliance startup.
- Carbon Monoxide Detectors: These are your most crucial safety device. Install CAN/CSA 6.19-M certified detectors in sleeping areas and test them periodically. Any alarm from a CO detector warrants immediate action and professional investigation.
If you suspect backdrafting or carbon monoxide presence, ventilate your home immediately and contact emergency services or a qualified HVAC professional.
Conclusion
Maintaining your home heating and water systems is an investment in your property’s value, your family’s comfort, and, most importantly, their safety. By understanding the common issues like corrosion, sludge, and scale, and by implementing regular cleaning, chemical treatments, and filtration, we can significantly extend the life and efficiency of our essential utilities.
From the specific requirements of hydronic heating versus cooling systems to the critical safety protocols for fuel-burning appliances and the diligent care of domestic water heaters, each component plays a vital role. Proactive steps like annual professional inspections, regular filter changes, and seasonal winterization are not merely suggestions; they are essential practices that prevent costly breakdowns and ensure peace of mind.
We encourage every homeowner to adopt a proactive approach, creating an annual inspection log to track maintenance activities and identify trends. This preventative utility care not only reduces energy costs and contributes to a healthier indoor environment but also protects your home’s structural integrity. By staying informed and taking consistent action, we can ensure our homes remain warm, safe, and comfortable for years to come.